Embed Size (px)
Citation preview
8/2/2019 Banco doble Uso
http://slidepdf.com/reader/full/banco-doble-uso 1/11
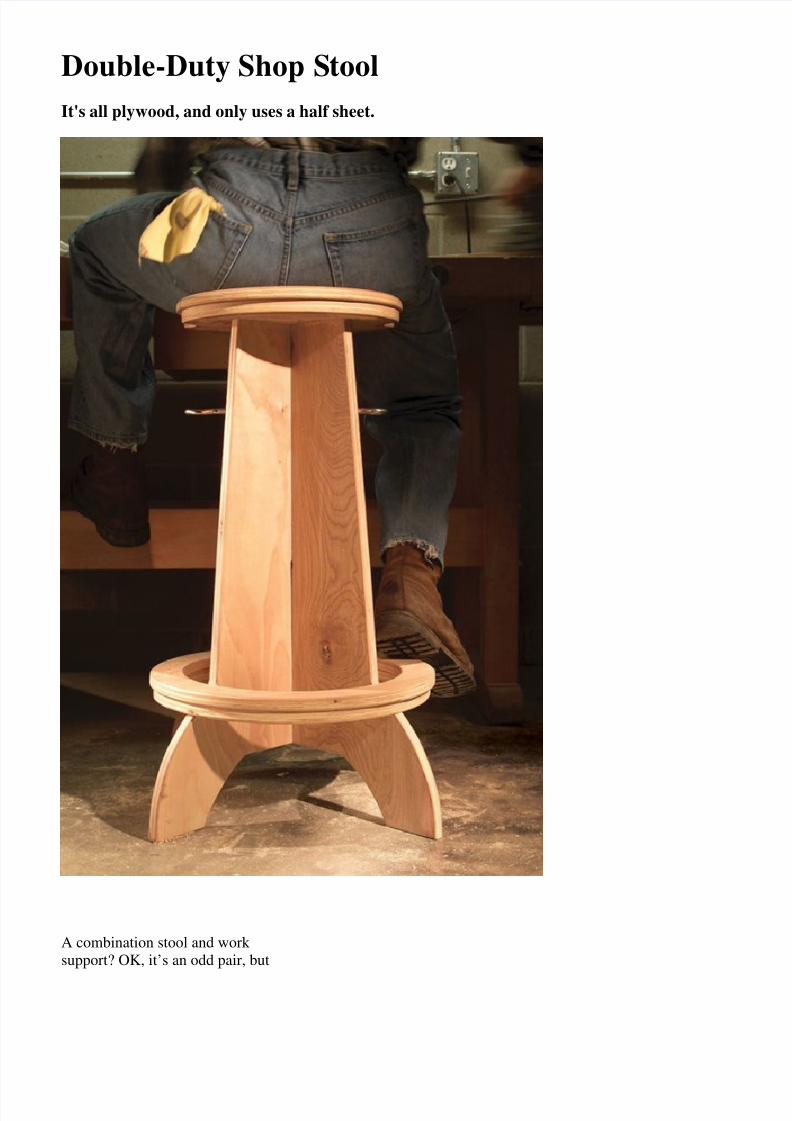
Double-Duty Shop Stool
It's all plywood, and only uses a half sheet.
A combination stool and work support? OK, it’s an odd pair, but
8/2/2019 Banco doble Uso
http://slidepdf.com/reader/full/banco-doble-uso 2/11
in my crowded shop, it makes a lotof sense. Anything that takes upless room is a good idea! Thestool’s seat is divided into threepieces. When you raise the centersection, you get an absolutely rigidwork support that extends to 48 in.high. That’s tall enough to hold
long pieces on a drill press or serveas an outfeed support for abandsaw or tablesaw. Mostcommercial roller stands don’textend this high. Just turn a simplehandle—a hardware-store eyebolt—and the telescoping top locksin place.
Materials and Tools
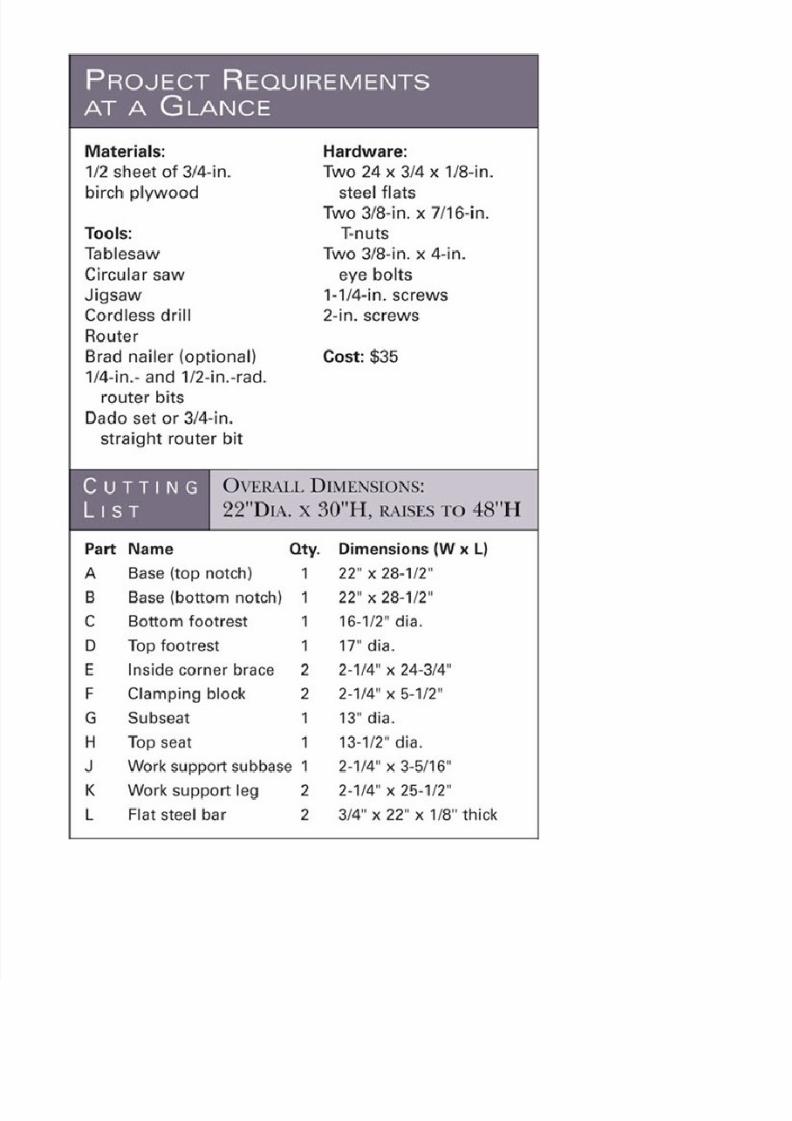
Cut all the parts of the stool fromone half-sheet (4 ft. x 4 ft.) of 3/4-in. birch plywood (about $25).Birch plywood makes the best-looking stool for the least amountof money. Its faces are free of ugly
knots and its edges are virtuallyfree of voids. But you’re free tochoose any kind of 3/4-in. plywoodwithout voids, such as Balticbirch, marine-grade plywood orAB fir plywood. Use plywood-cutting blades in your circular sawand jigsaw to avoid splintering.
Lay Out the Parts
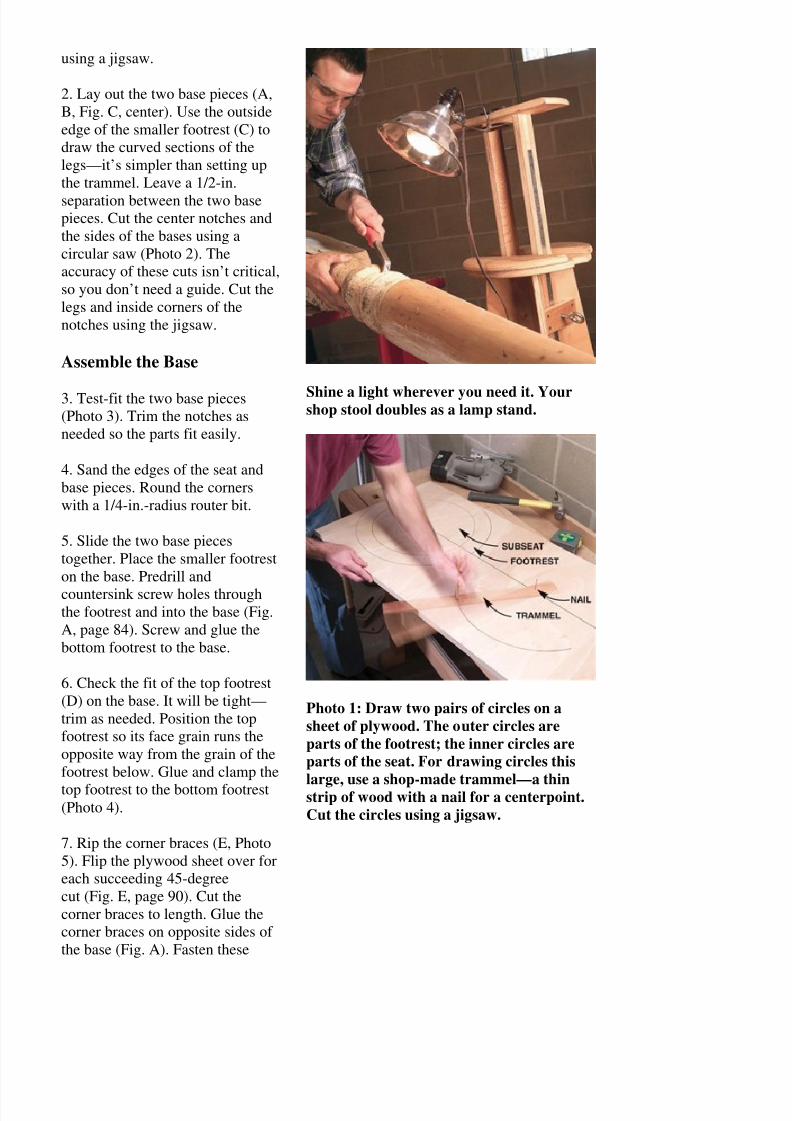
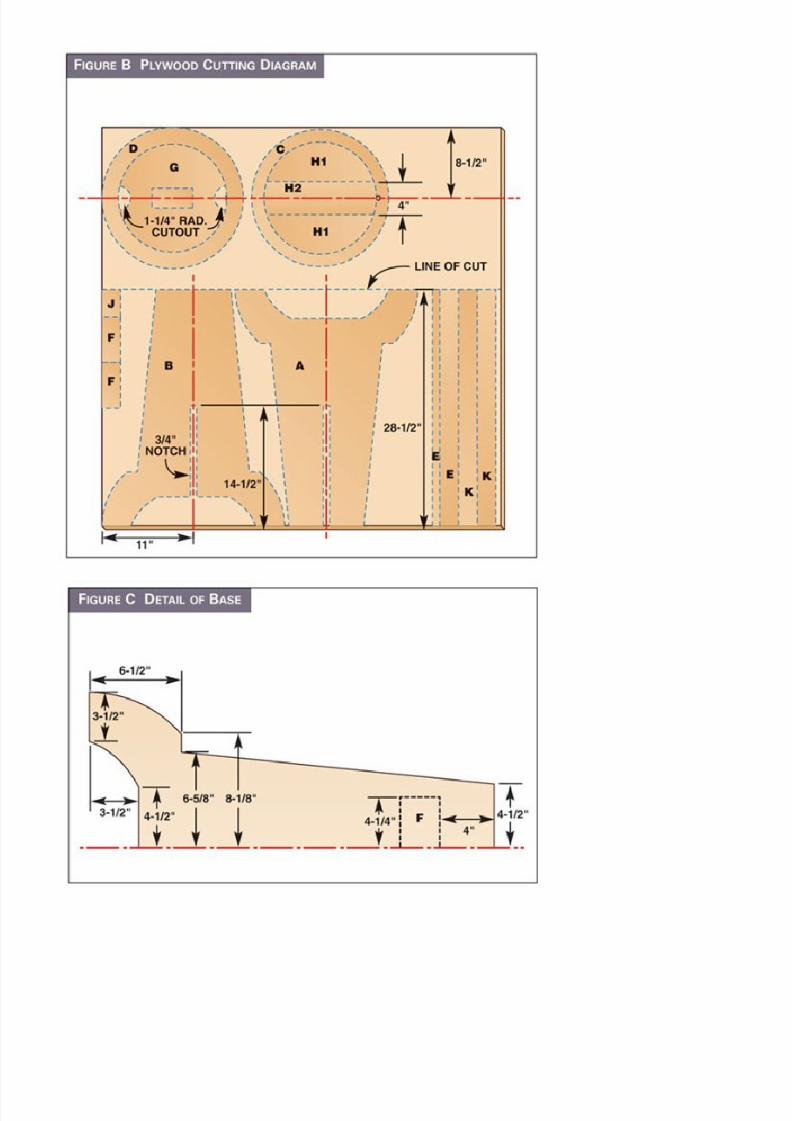
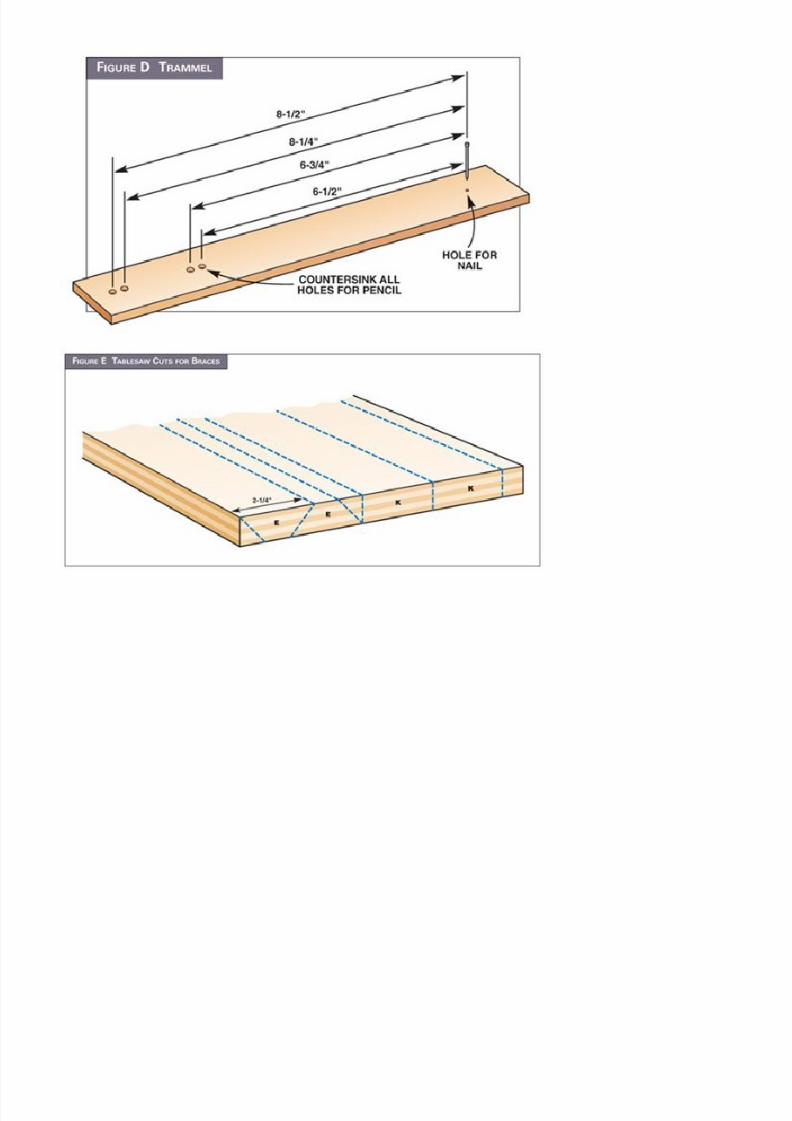
1. Cut the plywood into two largerectangular pieces (Fig. B, above).Draw a centerline on the smallerpiece for laying out two sets of nesting circles. Use a trammel (Fig.D, below) to draw two footrests (C,D) and two top pieces (G, H, Photo1). Drill start holes to fit your jigsaw blade. Cut all the circles
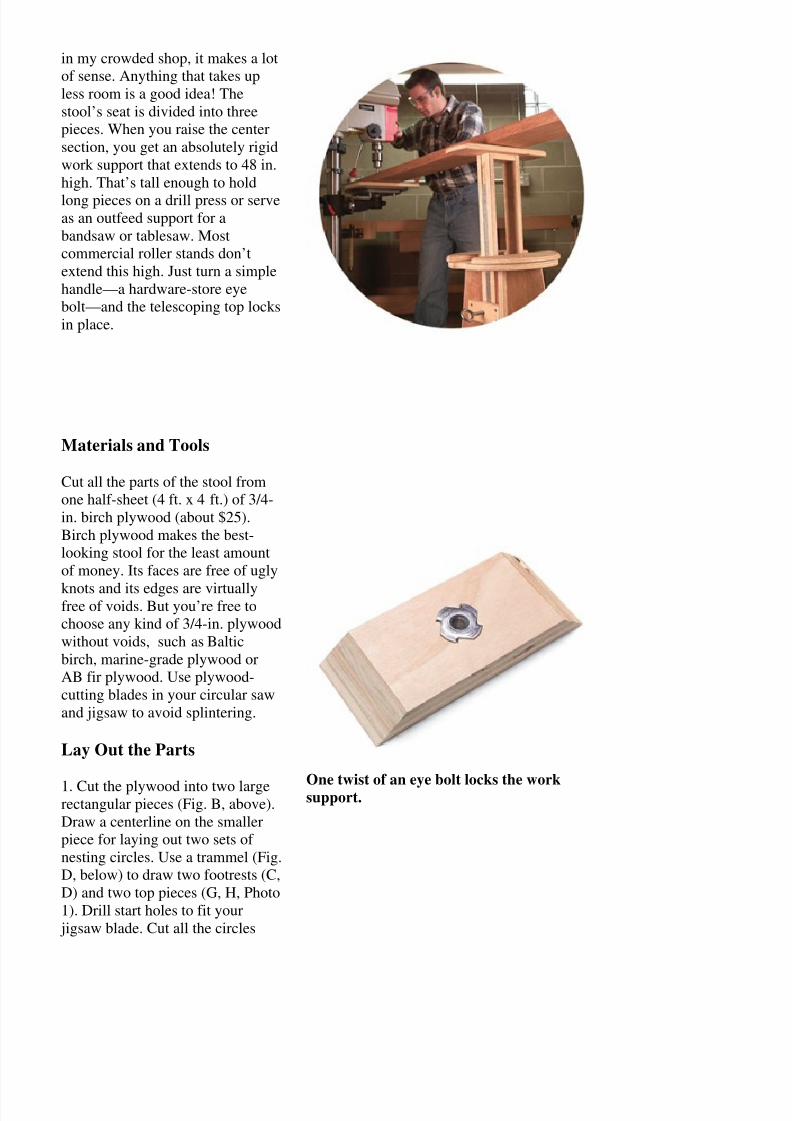
One twist of an eye bolt locks the worksupport.
8/2/2019 Banco doble Uso
http://slidepdf.com/reader/full/banco-doble-uso 3/11
using a jigsaw.
2. Lay out the two base pieces (A,B, Fig. C, center). Use the outsideedge of the smaller footrest (C) todraw the curved sections of thelegs—it’s simpler than setting upthe trammel. Leave a 1/2-in.
separation between the two basepieces. Cut the center notches andthe sides of the bases using acircular saw (Photo 2). Theaccuracy of these cuts isn’t critical,so you don’t need a guide. Cut thelegs and inside corners of thenotches using the jigsaw.
Assemble the Base
3. Test-fit the two base pieces(Photo 3). Trim the notches asneeded so the parts fit easily.
4. Sand the edges of the seat andbase pieces. Round the cornerswith a 1/4-in.-radius router bit.
5. Slide the two base piecestogether. Place the smaller footreston the base. Predrill and
countersink screw holes throughthe footrest and into the base (Fig.A, page 84). Screw and glue thebottom footrest to the base.
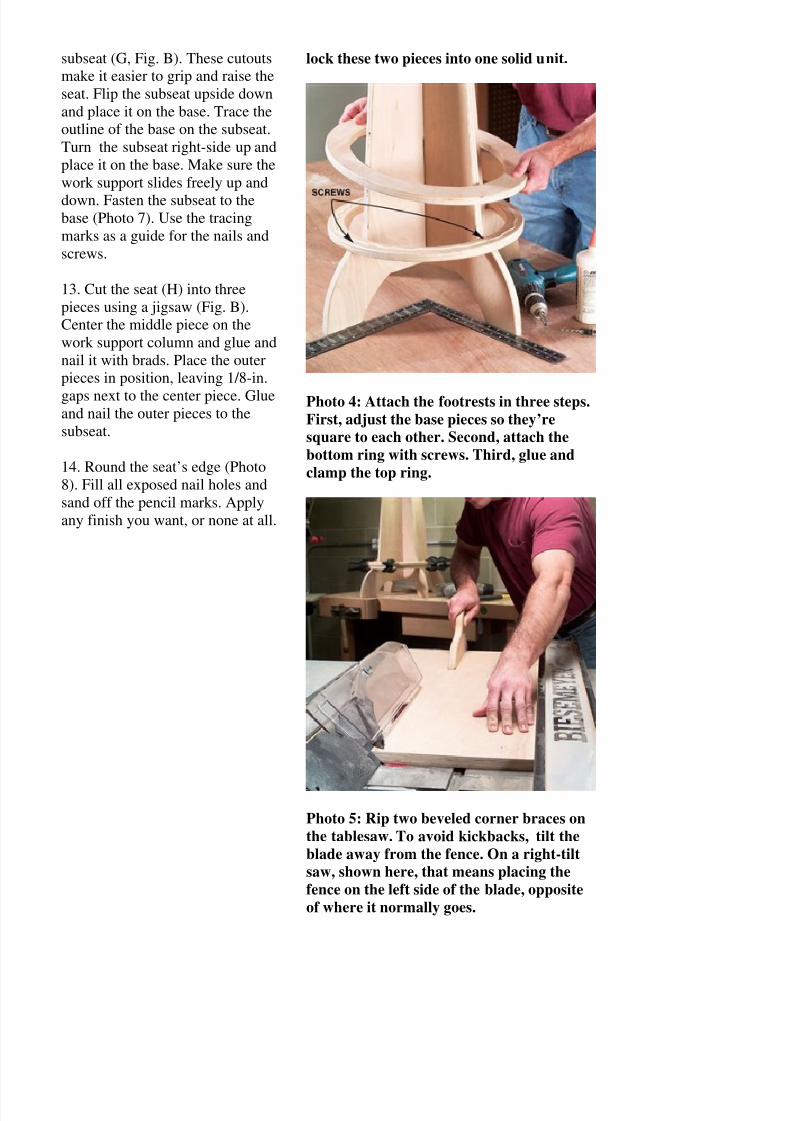
6. Check the fit of the top footrest(D) on the base. It will be tight—trim as needed. Position the topfootrest so its face grain runs theopposite way from the grain of thefootrest below. Glue and clamp the
top footrest to the bottom footrest(Photo 4).
7. Rip the corner braces (E, Photo5). Flip the plywood sheet over foreach succeeding 45-degreecut (Fig. E, page 90). Cut thecorner braces to length. Glue thecorner braces on opposite sides of the base (Fig. A). Fasten these
Shine a light wherever you need it. Yourshop stool doubles as a lamp stand.
Photo 1: Draw two pairs of circles on a
sheet of plywood. The outer circles are
parts of the footrest; the inner circles are
parts of the seat. For drawing circles this
large, use a shop-made trammel—a thinstrip of wood with a nail for a centerpoint.
Cut the circles using a jigsaw.
8/2/2019 Banco doble Uso
http://slidepdf.com/reader/full/banco-doble-uso 4/11
pieces using a brad nailer, orpredrill and countersink holes for1-1/4-in. screws.
8. Cut and miter two clampingblocks (F). Drill a 7/16-in. hole inthe center of each block andhammer in a T-nut on the inside.
Mark the location of the ends of the clamping blocks on the basepieces (Fig. C). Then glue andscrew the clamping blocks to thebase (Photo 6).
Install the Telescoping
Support
9. Rip the work support legs (K).Cut them to length and sand theiredges. Cut a groove down thecenter of each leg (Fig. A). Use adado set on the tablesaw or a 3/4-in. straight bit in your router.
10. Drill and countersink screwholes at the top and bottom of twopieces of 1/8-in. x 3/4-in. flat mildsteel. Fasten the steel (L) to thework support legs. (You don’t needscrews if you use epoxy orpolyurethane glue.) The eye boltsthat clamp the work support bearagainst this steel. Without the steel,the bolts will dig into the wood.
11. Cut the work support subbase(J). Assemble the work supportcolumn by gluing and nailing thelegs to the subbase. When youglue, be sure the legs are square tothe subbase. Cut a rectangle in the
middle of the subseat (G) using a jigsaw (Fig B). Test the fit of thework support column in thisopening. Slide the work supportdown the base and leave it inposition.
Add the Seat
12. Cut two semicircles in the
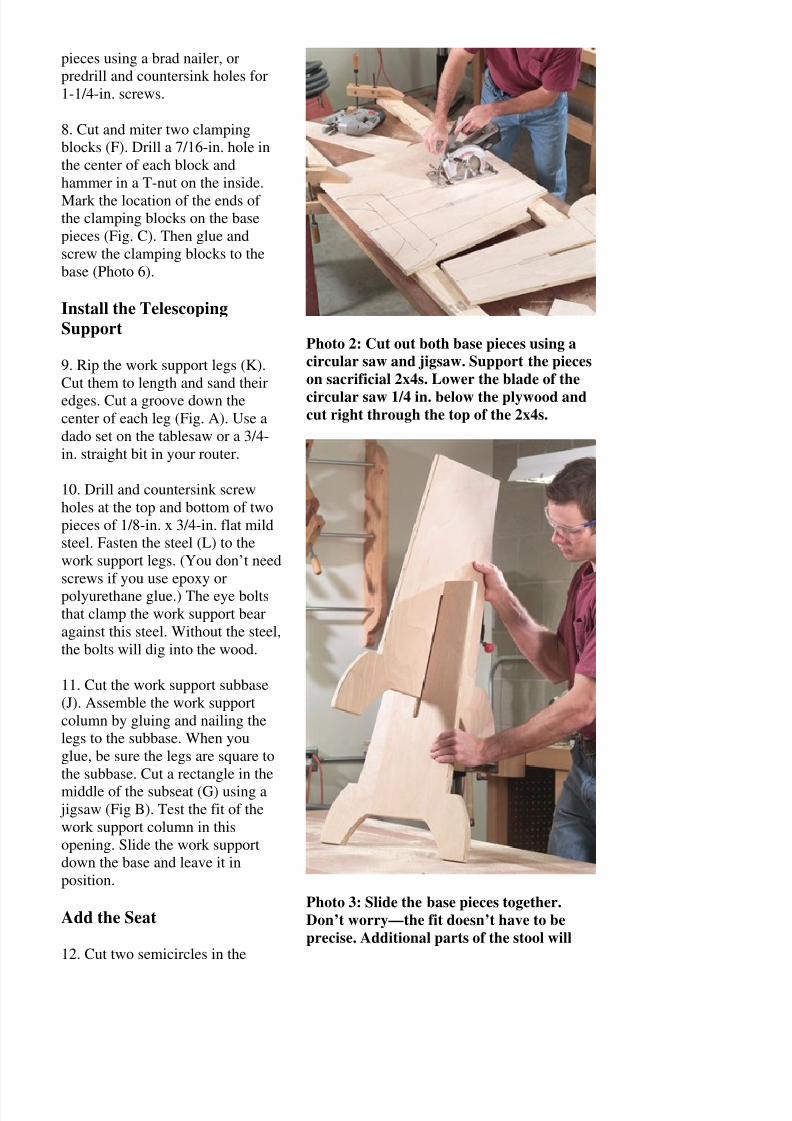
Photo 2: Cut out both base pieces using a
circular saw and jigsaw. Support the pieces
on sacrificial 2x4s. Lower the blade of the
circular saw 1/4 in. below the plywood andcut right through the top of the 2x4s.
Photo 3: Slide the base pieces together.
Don’t worry—the fit doesn’t have to be
precise. Additional parts of the stool will
8/2/2019 Banco doble Uso
http://slidepdf.com/reader/full/banco-doble-uso 5/11
subseat (G, Fig. B). These cutoutsmake it easier to grip and raise theseat. Flip the subseat upside downand place it on the base. Trace theoutline of the base on the subseat.Turn the subseat right-side up andplace it on the base. Make sure thework support slides freely up and
down. Fasten the subseat to thebase (Photo 7). Use the tracingmarks as a guide for the nails andscrews.
13. Cut the seat (H) into threepieces using a jigsaw (Fig. B).Center the middle piece on thework support column and glue andnail it with brads. Place the outerpieces in position, leaving 1/8-in.
gaps next to the center piece. Glueand nail the outer pieces to thesubseat.
14. Round the seat’s edge (Photo8). Fill all exposed nail holes andsand off the pencil marks. Applyany finish you want, or none at all.
lock these two pieces into one solid unit.
Photo 4: Attach the footrests in three steps.
First, adjust the base pieces so they’re
square to each other. Second, attach the
bottom ring with screws. Third, glue and
clamp the top ring.
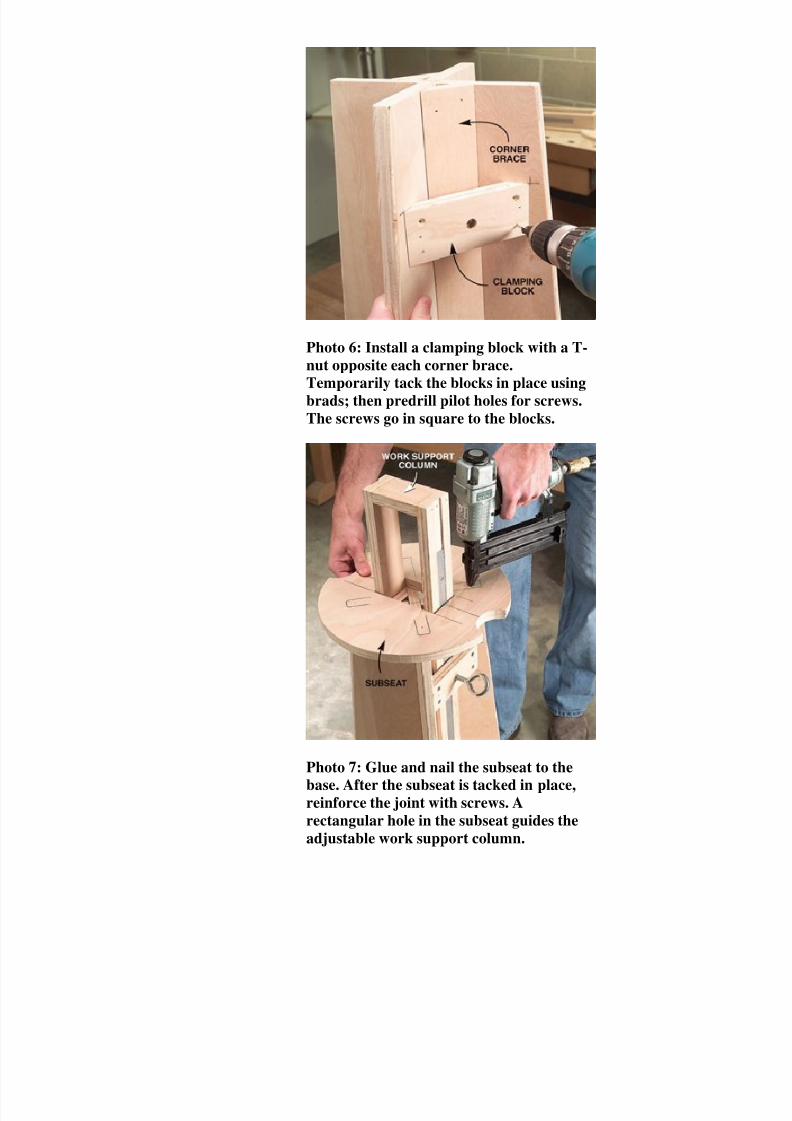
Photo 5: Rip two beveled corner braces on
the tablesaw. To avoid kickbacks, tilt the
blade away from the fence. On a right-tilt
saw, shown here, that means placing the
fence on the left side of the blade, opposite
of where it normally goes.
8/2/2019 Banco doble Uso
http://slidepdf.com/reader/full/banco-doble-uso 6/11
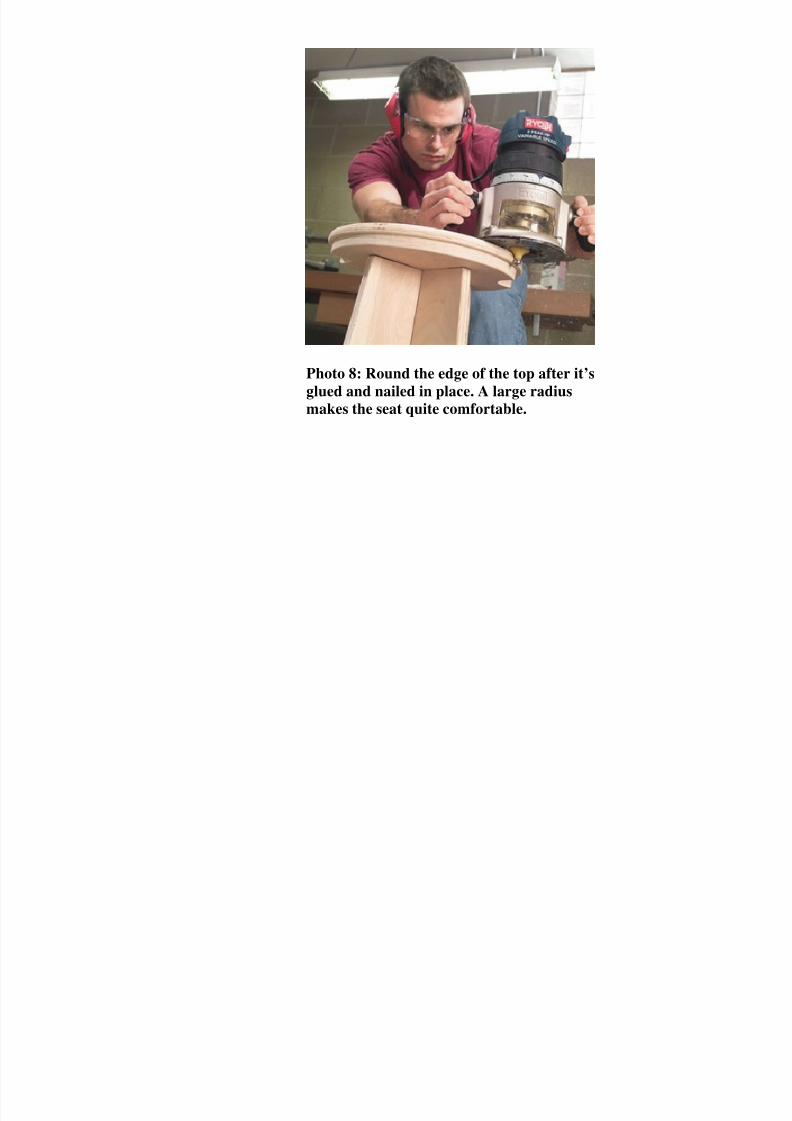
Photo 6: Install a clamping block with a T-
nut opposite each corner brace.
Temporarily tack the blocks in place using
brads; then predrill pilot holes for screws.
The screws go in square to the blocks.
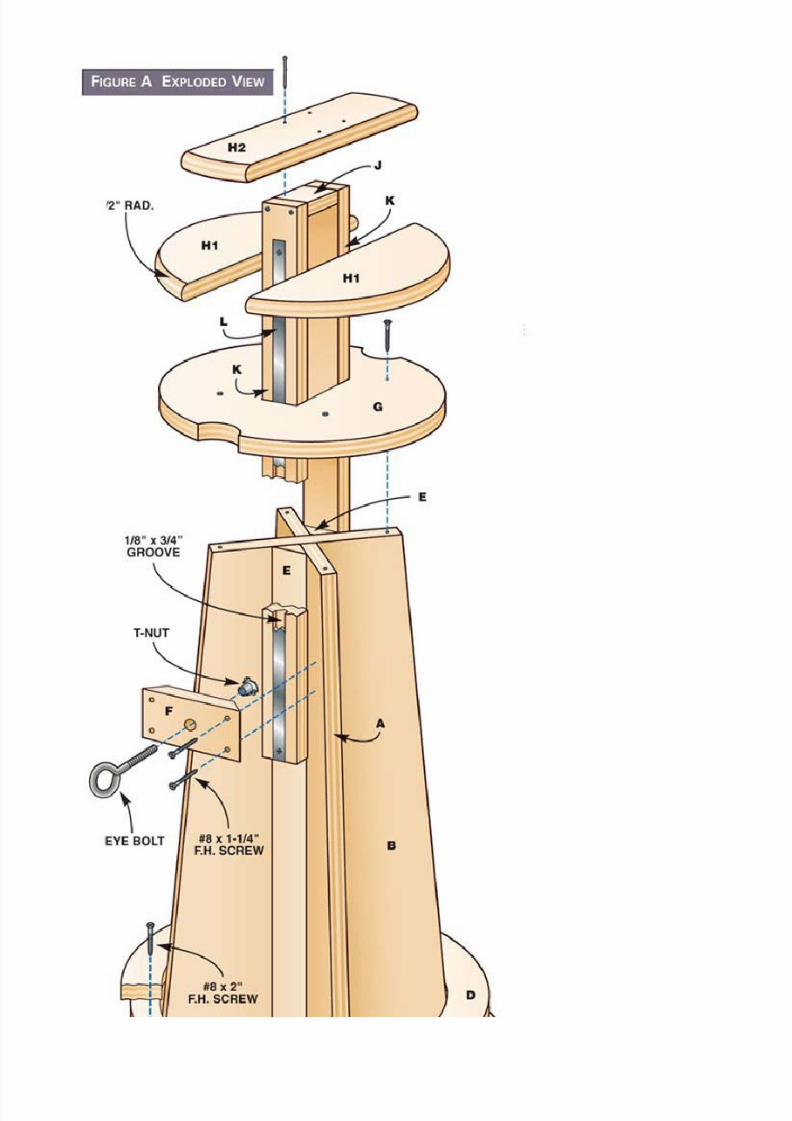
Photo 7: Glue and nail the subseat to the
base. After the subseat is tacked in place,reinforce the joint with screws. A
rectangular hole in the subseat guides the
adjustable work support column.
8/2/2019 Banco doble Uso
http://slidepdf.com/reader/full/banco-doble-uso 7/11
Photo 8: Round the edge of the top after it’s
glued and nailed in place. A large radiusmakes the seat quite comfortable.
8/2/2019 Banco doble Uso
http://slidepdf.com/reader/full/banco-doble-uso 8/11
8/2/2019 Banco doble Uso
http://slidepdf.com/reader/full/banco-doble-uso 9/11
8/2/2019 Banco doble Uso
http://slidepdf.com/reader/full/banco-doble-uso 10/11
8/2/2019 Banco doble Uso
http://slidepdf.com/reader/full/banco-doble-uso 11/11